Running digital modes often require nearly endless tinkering with COM port settings and application integrations. This trifecta of integrations can be a bit of a process, and this guide will be focused all around the Icom IC-7610.
If you prefer a video, here is a really good one that will get you through setting up N1MM+ and WSJT-X. If preferred, you can follow the video and then skip down to Configuring GridTracker.
Configuring N1MM+ to Communicate with IC-7610
If you haven’t already, download the IC-7610 Windows drivers. The radio will need to be connected to your PC using the USB 2.0 port. The USB 3.0 port is for different functionality and will not work for this purpose.
Next, download and install N1MM+. Please refer to their Getting Started Guide for instructions on obtaining the latest install and update packages.
Launch N1MM+. Select Config -> Configure Ports, Mode Control, Audio, Other…
On the Hardware tab, select the COM port identified by USB to UART Bridge in your device manager. Click the Set button next to that port and match the settings below.
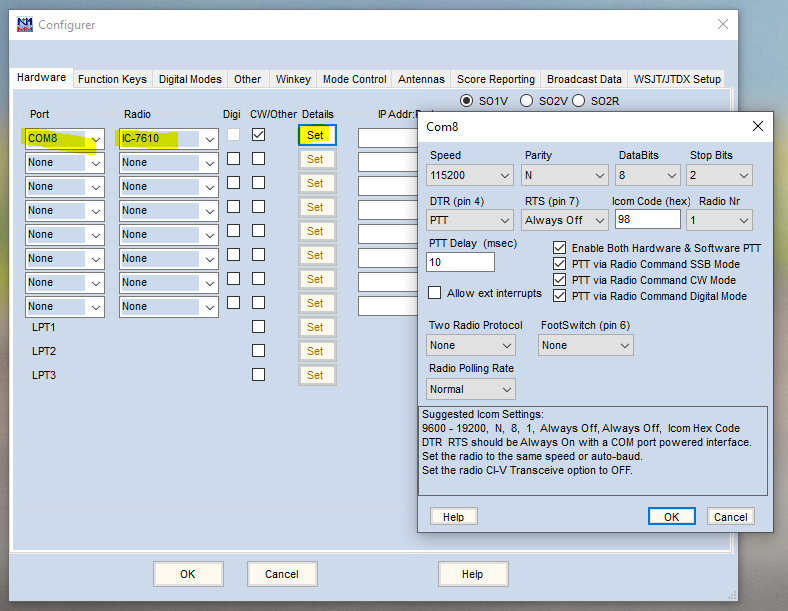
Click OK to save settings, and then go right back to Config -> Configure Ports, Mode Control, Audio, Other…
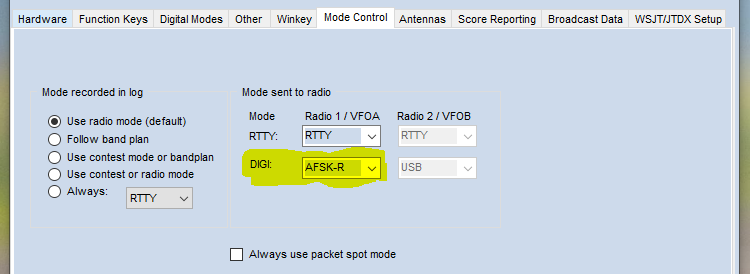
Select the Mode Control tab and then change the PSK drop-down to AFSK-R option. Click OK to save and close.
At this point, the application should be communicating with your radio. Selecting a band in the application should tune the radio, and tuning frequencies on the radio should update the application.
Configuring WSJT-X
If you haven’t already installed WSJT-X, go ahead and do that now.
WSJT-X will be launched from within N1MM+. Launch N1MM+ and go back to that same configure window we’ve been to a couple times already. Go to the WSJT/JTDX Setup tab.
Select Enable under the WSJT-X / Radio #1 Settings. Leave the IP Address and UDP Port at their defaults. Locate the WSJT-X binary as shown below. Your settings should look like below.
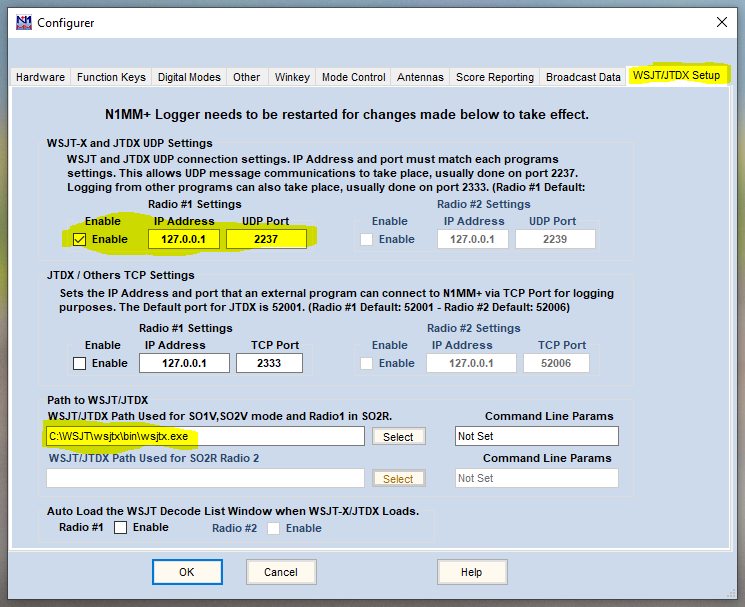
Click OK to save.
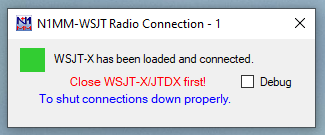
Select Window -> Load WSJT/JTDX. You’ll see N1MM load a tiny window like this:
It’s OK that it shows a failed connection.
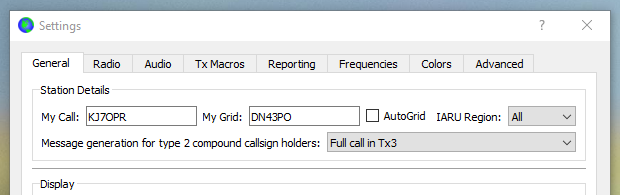
In WSJT-X, select File -> Settings…
You may notice that this looks like a new install of WSJT-X, even if you used it before. Enter all your customizes again, like call sign and grid.
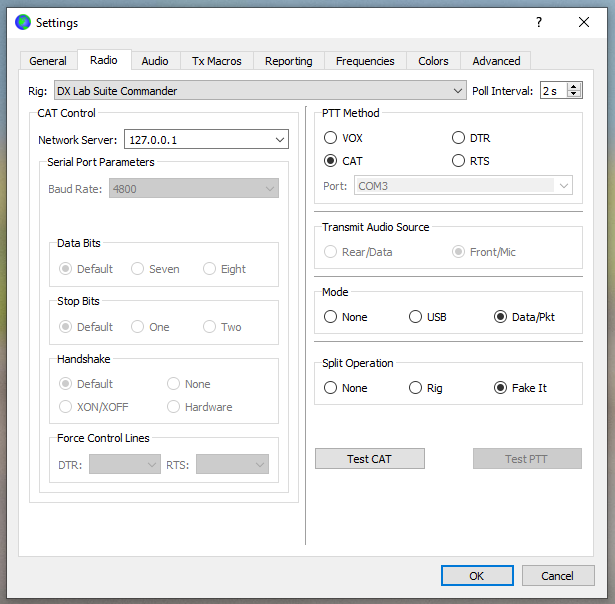
Head over to the Radio tab and configure as shown:
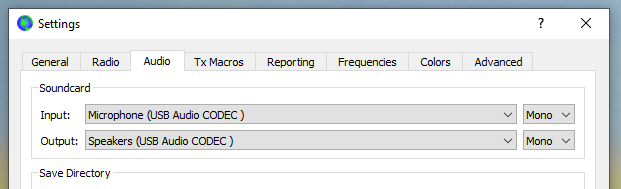
On the Audio tab, select USB Audio CODEC. It may have a number and that’s OK.
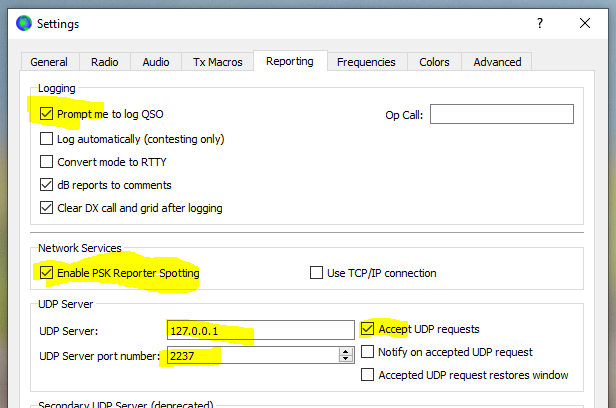
On the Reporting tab, make the highlighted changes. Other settings here are your preference.
Click OK to save. Now that tiny window should be all happy.
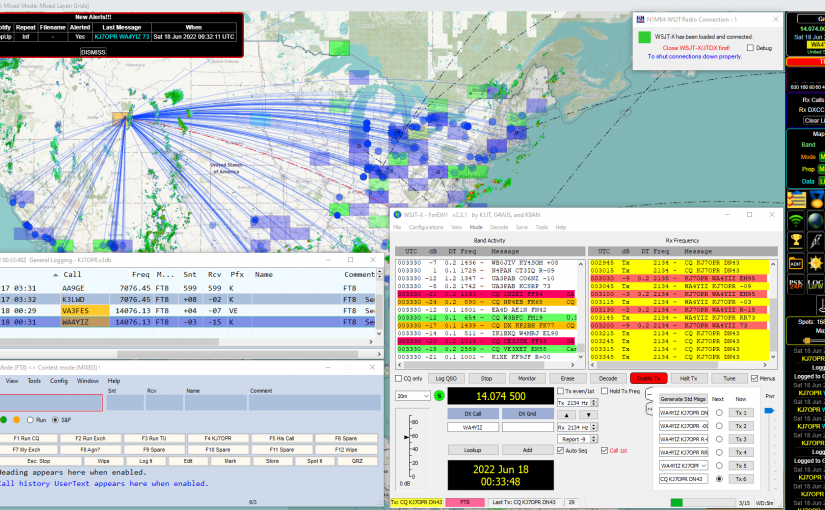
At this point, N1MM+ should be playing nice with WSJT-X. Go ahead and make a contact or two and see how it works. You’ll notice that N1MM+ will start adding emphasis and highlights to the WSJT-X message list. N1MM+ can also initiate QSOs with bidirectional communication. Don’t get used to that feature though because that communication will only go one way (WSJT-X -> N1MM) once we introduce GridTracker to the mix.
Configuring GridTracker
GridTracker is an incredibly visual application and your preferences will likely vary from mine, so don’t feel like you need to follow these steps exactly. Only settings that really matter are the UDP post settings.
Close out of WSJT-X and N1MM+, in that order.
Download and install GridTracker.
Click the Settings gear icon (circled) and make sure the Receive and Forward UDP Messages section looks like this.
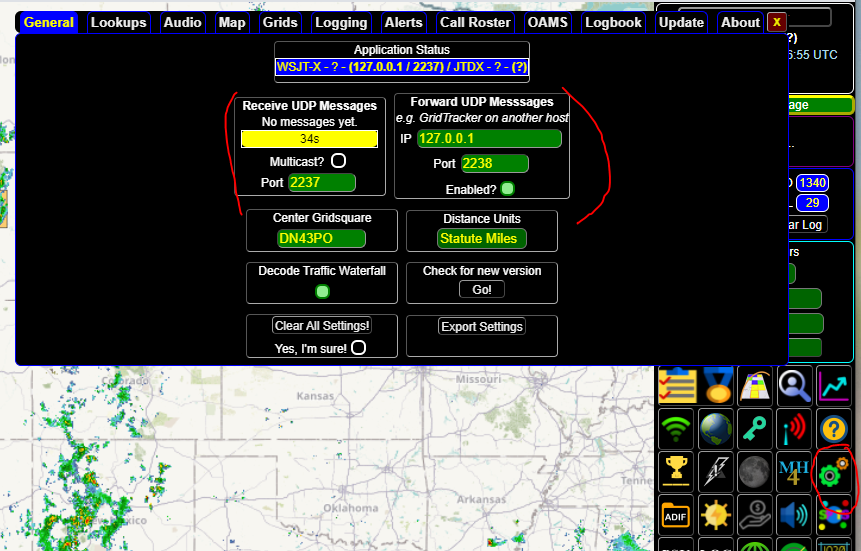
What we are doing here is interjecting GridTracker in the middle of N1MM+ and WSJT-X. So now we need to go back to N1MM+ and change the listening port to 2238. So the communication goes WSJT-X -> GridTracker -> N1MM+, in that direction. That’s why N1MM+ loses the ability to control WSJT-X, and that’s OK in my opinion.
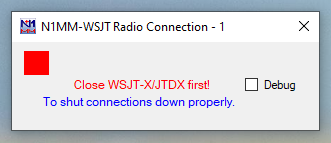
With GridTracker still running, launch N1MM+. When launching N1MM+, you may see this message:
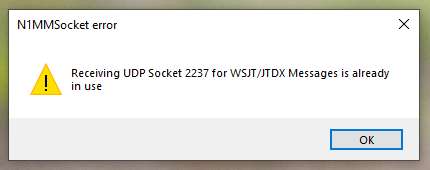
That’s expected. Go back into the settings and bump the port number up to 2238. That’s the re-transmitting port from GridTracker.
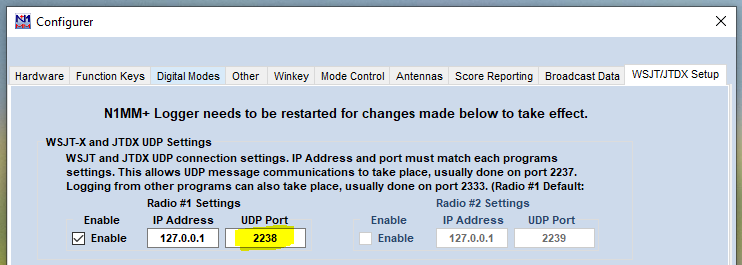
Click OK to save. Close and restart N1MM+. This time it shouldn’t have complained about the port being in use.
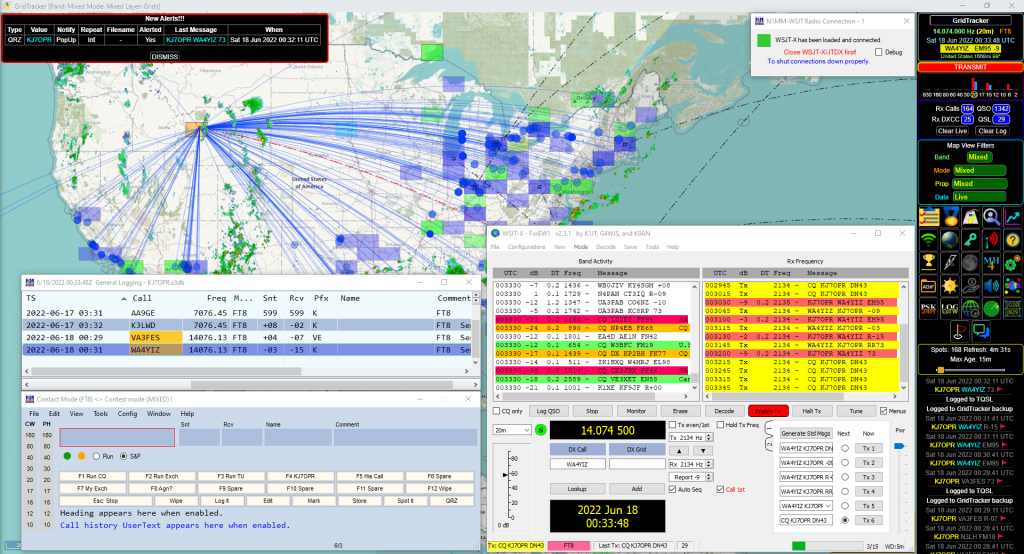
Now let’s go for it. Select Window -> Load WSJT/JTDX. Pick a spot in the waterfall and make a contact. WSJT-X should stay operational with N1MM showing a happy little window and GridTracker dutifully plotting your received messages and spots.
When it’s time to close everything down, I would do in this order: WSJT-X, N1MM+, GridTracker.